- WhatsApp: 8613777772066
- Email: [email protected]


If you manage electrical installs, facility maintenance, or panel-building for your business, you already know that a wiring job is only as good as its support. Cables that sag, rub, or pull loose don’t just look unfinished — they create real safety risk, code violations, and costly callbacks. One of the questions your crew probably asks on every job is simple: how far apart should cable clips be?
The honest answer is “it depends” — but it doesn’t have to be a guess. In this article, you’ll get the spacing ranges your team can apply on-site, the factors that push those numbers up or down, and a quick way to check your plan before you buy a single clip.
When you space cable clips correctly, you’re not just tidying up a wire run — you’re protecting your business on three fronts:

Getting the spacing right the first time protects your reputation with clients and keeps your crews moving instead of going back to fix avoidable problems.
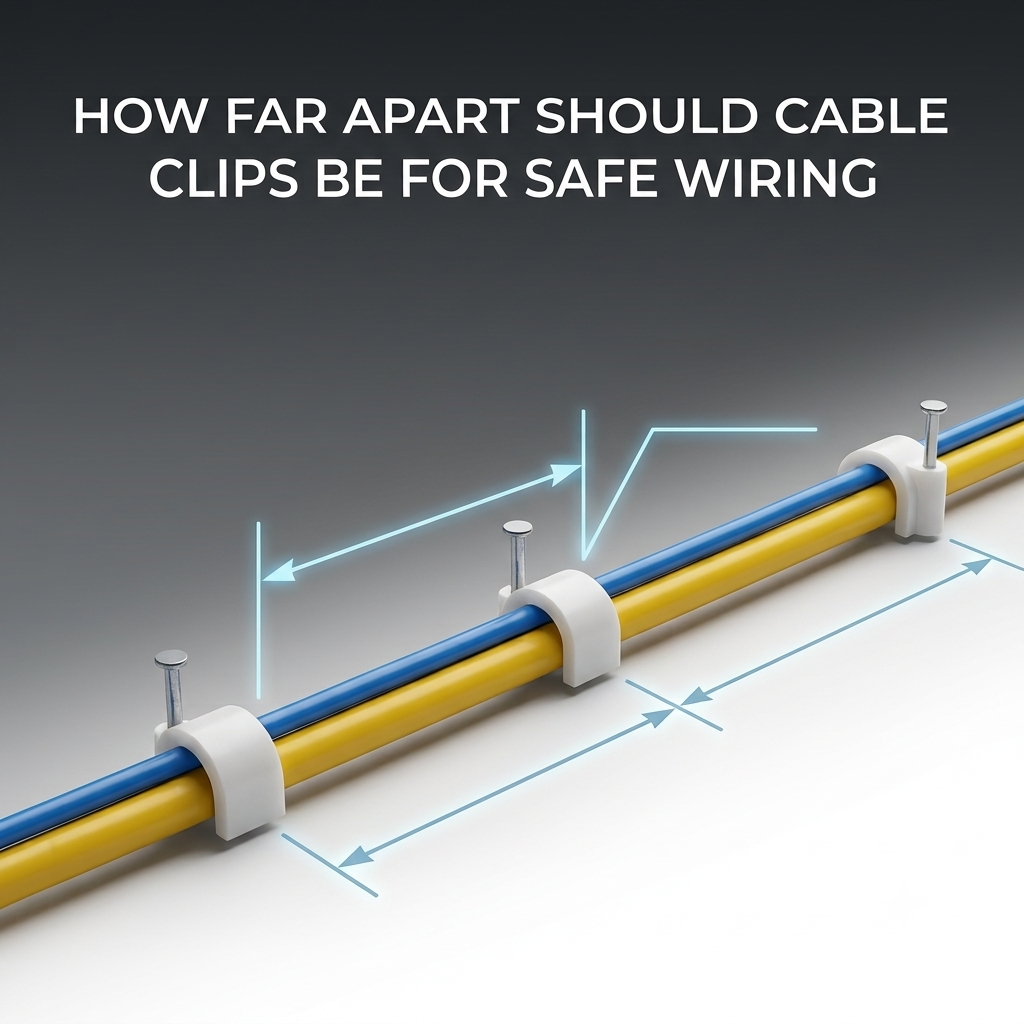
There’s no single number that fits every job, because cable diameter, weight, and installation environment all change the math. That said, most electrical codes and manufacturer specs converge around similar ranges. Use the table below as your starting point, then adjust using the factors in the next section.
| Cable Type / Diameter | Horizontal Run Spacing | Vertical Run Spacing | Typical Application |
|---|---|---|---|
| Data / low-voltage, up to 6 mm | 12–18 in (300–450 mm) | 18–24 in (450–600 mm) | Structured cabling, control wiring |
| NM / branch circuit cable | Within 12 in of box, then every 4.5 ft | Same interval, every 4.5 ft | Residential and commercial branch circuits |
| Power cable, 6–20 mm | 24–30 in (600–750 mm) | 30–36 in (750–900 mm) | Feeder cable, machine wiring |
| Heavy power cable, over 20 mm | 18–24 in (450–600 mm) | 24–30 in (600–750 mm) | High-load industrial runs — tighter spacing supports extra weight |
| Outdoor / UV-exposed cable | 12–18 in (300–450 mm) | 18–24 in (450–600 mm) | Tighter spacing resists wind and thermal movement |
| High-vibration environment | 8–12 in (200–300 mm) | 12–18 in (300–450 mm) | Machinery, vehicles, vibrating equipment |
These ranges reflect common industry practice and widely used code references. Always confirm final spacing against your local code and the clip manufacturer’s load rating before your team starts installing.
Sourcing clips for a job like this?
Once you know the general range, you need to adjust it for your specific job. Here’s what should shift your numbers:
If your run terminates at a panel or enclosure, don’t stop at clip spacing alone — the cable entry point matters just as much. If you’re specifying enclosure hardware for the same project, it’s worth reviewing our PG vs. metric cable gland comparison so your whole wiring system — clips and glands — is specified consistently.
Use this simple process before you place your clip order:
Have your spacing plan ready? Talk to BOESE about clip sizes, materials, and bulk pricing for your next installation or panel-build order.
Even experienced crews run into these issues on-site:

Spacing only works if the clip itself is right for the job. When you’re specifying clips for your business, match them to your environment and cable type:
For a closer look at how different clip styles are built and installed, see our cable clip types and installation guide for professional wiring projects.
BOESE manufactures cable clips for electrical contractors, OEMs, and distributors worldwide. Get the right sizes and materials for your spacing plan, shipped in bulk for your business.
For most general-purpose cable, plan on 12–24 inches (300–600 mm) between clips on horizontal runs, tightening that range for heavier or vibration-exposed cable and loosening it slightly for light data cable.
Vertical runs can typically use slightly wider spacing than horizontal runs — often 18–36 inches (450–900 mm) depending on cable weight — since gravity keeps the cable straight rather than causing it to bow.
Cable sags between supports, increasing strain on connection points, chafing against edges, and raising the risk of a failed inspection or physical damage over time.
Yes. Over-clipping adds unnecessary material and labor cost without improving safety, and in some cases can restrict a cable’s natural thermal expansion.
Yes — it’s one of the biggest factors. Thicker, heavier cable needs tighter spacing to prevent sagging, while thin, lightweight cable can go longer between supports.
Generally yes. Outdoor and UV-exposed cable often needs tighter spacing to resist wind load and the expansion and contraction caused by temperature swings.
Base your spacing on the combined weight and diameter of the full bundle, not a single cable, and use the tightest spacing appropriate for the heaviest cable in the group.
Many do, particularly for specific cable types like NM cable. Always check your local code, since it can set a maximum spacing that overrides general manufacturer guidance.
Divide your total run length by your chosen spacing interval, then add one extra clip to cover the starting point of the run.
Vibration-prone areas — near motors, compressors, or vehicle mounts — typically need spacing tightened to 8–18 inches (200–450 mm) to prevent the cable from working loose or chafing at the clip.
Getting your cable clip spacing right protects your crew’s time, your client’s inspection, and your business’s reputation on every job. Use the ranges above as your baseline, adjust for your specific environment, and reach out to BOESE when you’re ready to order clips sized for the job in front of you.


Modern enterprise integrating R&D, production, sales and service
Privacy Policy | Sitemap
Copyright BOESE Co.,Ltd SUPPORT BY :JUNJ
 Optimized by Seraphinite Accelerator